We’re your friendly South Seattle legal cannabis shop, and this week we’re going back to basics with one of the most essential weed-smoking skills you can learn: how to roll a proper joint.
Smoking Js is one of the most popular ways to enjoy cannabis, and the art of rolling a proper joint is something everyone should learn to maximize the experience and enjoy the flavor of your flower. There are countless methods and variations for proper doobie construction, but if you follow our simple seven-step guide, you’ll be rolling successful joints in no time.
1. Gather Your Supplies
Every good joint begins with great bud, a grinder, and high-quality papers. You can find all of these essentials, plus extras like crutch and tip materials at your favorite South Seattle legal cannabis shop, NiMBiN!
2. Grind
Grind down your cannabis into shake using a metal grinder, which will prevent your hands from getting sticky. If your cannabis is dried well, it should break down easily. If you don’t have a grinder, you can use scissors and a shot glass, a coffee grinder, a kitchen knife, or even a penny.
However you grind your bud, make sure the consistency is not too chunky or too powdery - try to find that sweet spot in between.
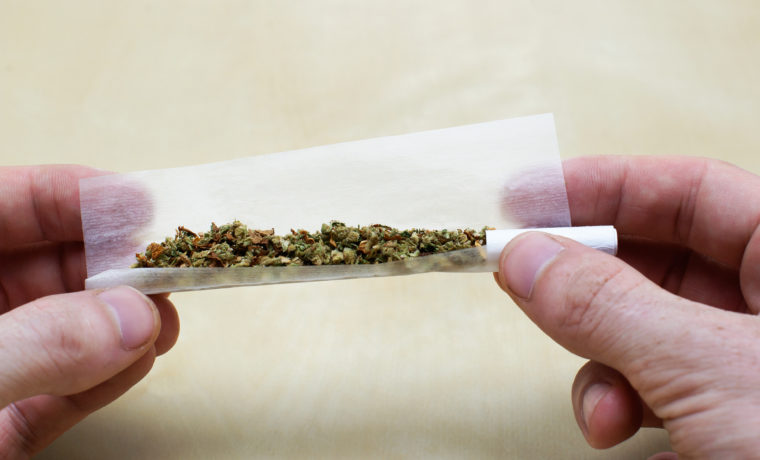
3. Make a Crutch
A crutch, also known as a tip or a filter, adds some stability to your joint and allows you to enjoy every bit of cannabis without burning your fingertips or accidentally swallowing any shake that falls out. Some joint papers include material to make a crutch with, but you can make one out of most anything like a small piece of cardboard or a business card.
To make a crutch, start by making a few accordion folds on the end of the cardboard, then roll it to the desired thickness of your joint. Most filters are only a few centimeters in length.
4. Fill It Up
Find some papers you like. Most people prefer hemp papers because they are thin but strong and burn evenly without affecting the flavor of the cannabis.
Hold your paper lengthwise and place the crutch in the middle on one end. Then add your desired amount of shake (half a gram to a gram) along the middle of the paper, leaving a little space at the end, and begin to shape the joint with your fingers.
5. Pack
Once the crutch and cannabis are loaded into the paper, begin to roll the joint gently with your fingers to pack the cannabis down into its final shape. Be careful not to pack your joint too tight or it might burn unevenly. Conversely, if you pack your joint too loose, the ember may die down if there is too much air between the shake.
6. Roll
This step can be the trickiest to master, but isn’t difficult to learn. Simply take the unglued side of your paper and tuck it into the joint, over the shake. Then apply a little moisture to the glued side (a good lick usually does the trick), and wrap it over the joint to seal it closed, starting at the end with the crutch and working towards the top of the joint.
7. Finish and Enjoy!
Once your joint is rolled and sealed, pack down the top with the tip of a pen, a shoelace, or a small stick. If you won’t be lighting up for a while, you may want to close the tip of the joint with a twist.
Now you’re ready to enjoy your cannabis! There are countless ways to roll a proper joint, so have fun and be creative with different shapes and sizes. Just remember to follow this simple guide for a great joint every time.